
Immersive Experience Design Malaysia
Designing an immersive experience begins before selecting projectors, touchscreens, sensors or interactive software.
The first question should be simple:
What should visitors experience, understand or do?
A successful immersive installation connects the visitor journey, physical environment, digital content and technology into one coherent experience.
MyDigital Asia designs immersive and interactive experiences in Malaysia for exhibitions, museums, visitor centres, corporate experience centres, brand activations and events.
This guide explains how an immersive experience can be planned from the initial objective through concept development, technology selection, content production, testing and installation.
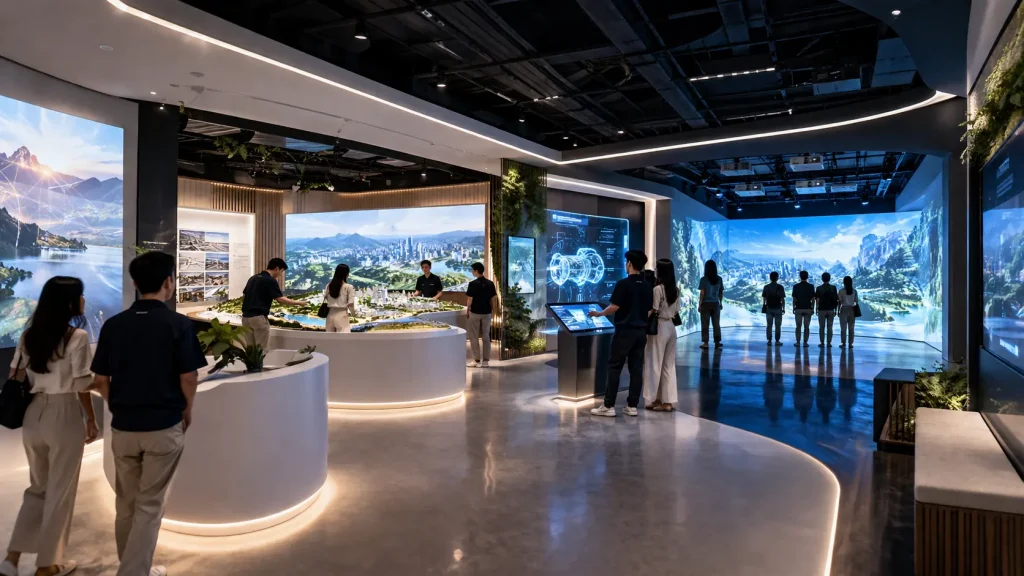
Immersive Experience Design at a Glance
A practical design process can be understood as:
Objective → Audience → Journey → Story → Space → Interaction → Technology → Content → Testing → Operation
| Stage | Key Question |
|---|---|
| Objective | What should the experience achieve? |
| Audience | Who will use it? |
| Journey | What should visitors do from beginning to end? |
| Story | What should they understand or remember? |
| Space | How can the physical environment support the experience? |
| Interaction | Where should visitors actively participate? |
| Technology | Which system best supports each function? |
| Content | What should visitors see, hear and interact with? |
| Testing | Does the complete journey work with real users? |
| Operation | How will the experience run after launch? |
Step 1: Define the Objective
The objective should be defined before deciding how immersive the space should look.
Different projects may need visitors to:
- Understand a company or organisation
- Explore a product
- Learn about history or culture
- Visualise future development
- Participate in a brand campaign
- Interact with scientific or educational content
- Experience a story emotionally
- Participate in a corporate event
These objectives require different experience structures.
A museum explaining historical events should not automatically use the same interaction style as a product launch designed to create excitement.
Defining the objective helps prevent technology from becoming the project objective itself.
Step 2: Understand the Audience
An immersive experience should be designed around the people who will actually use it.
Important audience considerations may include:
- Age range
- Language
- Group size
- Expected visitor volume
- Visit duration
- Accessibility
- Technology familiarity
- Whether visitors arrive individually or in groups
For example, an interactive experience designed for children may use larger visual targets, movement and immediate feedback.
A corporate visitor centre may need a more guided experience where a presenter controls the sequence while guests focus on information and discussion.
The same technology can therefore require very different interface and content design depending on the audience.
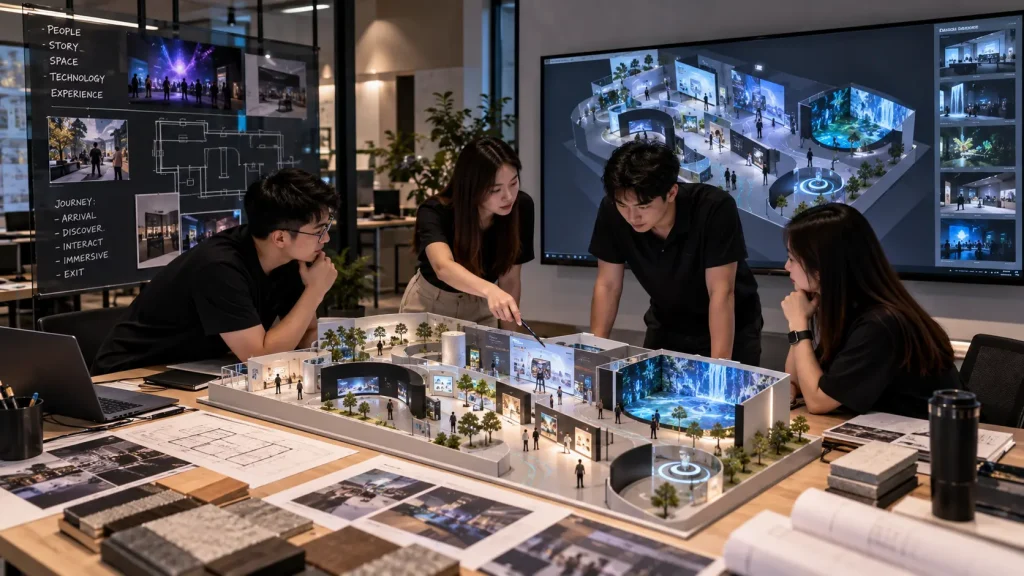
Step 3: Design the Visitor Journey
One of the most important parts of immersive experience design is deciding what happens from the moment visitors arrive until they leave.
A visitor journey may look like:
Attract → Enter → Discover → Interact → Understand → Remember
For a brand activation, it might instead be:
Notice → Participate → Explore Product → Receive Personalised Result → Continue
For a visitor centre:
Welcome → Introduction → Guided Story → Interactive Exploration → Future Vision → Exit
The journey helps determine how many experience zones are actually required.
Without a clear journey, projects can become collections of touchscreens, projection surfaces and interactive activities that do not connect with each other.
Step 4: Decide What Visitors Should Remember
An immersive experience can contain a large amount of information, but visitors are unlikely to remember everything.
Identify the most important messages before developing the content.
A useful question is:
If visitors remember only three things after leaving, what should those three things be?
These messages can then influence the story, visual hierarchy and interaction design.
Supporting information can still be available through touchscreens, interactive maps or detailed exhibits without overwhelming the main experience.
Step 5: Plan the Experience Zones
Once the visitor journey is understood, the physical space can be divided into meaningful experience zones.
For example, a corporate experience centre might contain:
- Welcome Zone – Introduction to the organisation.
- Story Zone – Company history, milestones or key achievements.
- Product Zone – Physical products connected to digital information.
- Interactive Zone – Hands-on exploration, simulation or data visualisation.
- Immersive Zone – A larger shared storytelling experience.
- Future Zone – Vision, innovation or upcoming developments.
Not every project needs six zones.
A smaller space may communicate the same story through two or three stronger experiences.
For experience centre applications, see Interactive Experience Centre Malaysia.
Step 6: Design Around the Physical Space
The venue should influence the experience rather than being treated as an empty box.
Important physical considerations include:
- Room dimensions
- Ceiling height
- Entrances and exits
- Columns
- Wall surfaces
- Floor surfaces
- Ambient light
- Existing architecture
- Power
- Network infrastructure
- Equipment access
- Visitor circulation
For projection-based experiences, the available throw distance and projector mounting positions can directly affect the visual design.
For interactive installations, sensor positions and visitor movement areas should be considered before physical structures are finalised.
Step 7: Choose Where Interaction Adds Value
Not every surface needs to be interactive.
Interaction is most useful when the visitor’s action helps them discover, influence or understand something.
Useful interaction patterns include:
| Visitor Action | Possible Experience |
|---|---|
| Touch | Explore detailed information or control content |
| Walk | Trigger responsive floor or environmental visuals |
| Gesture | Control visual content without physical contact |
| Move an Object | Reveal content related to a physical product or exhibit |
| Scan QR | Continue an experience on a personal mobile device |
| Make a Choice | Personalise the next part of the experience |
If visitors only need to watch an important cinematic story, forcing them to interact may weaken the experience.
Interaction should therefore be intentional rather than added simply because the technology is available.
Step 8: Select the Technology After the Interaction Is Defined
Once the desired visitor action is clear, suitable technology can be selected.
Possible technologies include:
- Touchscreens
- Projection mapping
- Multi-wall immersive projection
- Interactive floor projection
- Motion and depth sensors
- Cameras
- RFID
- Object detection
- LED displays
- Interactive physical models
- Mobile web experiences
- AI-assisted systems
The technology should solve a design requirement.
For example, if visitors need to compare detailed product specifications, a touchscreen may be more appropriate than gesture control.
If the objective is to make a group feel surrounded by a story, an immersive projection room may be more suitable.
Step 9: Decide Between Individual and Shared Experiences
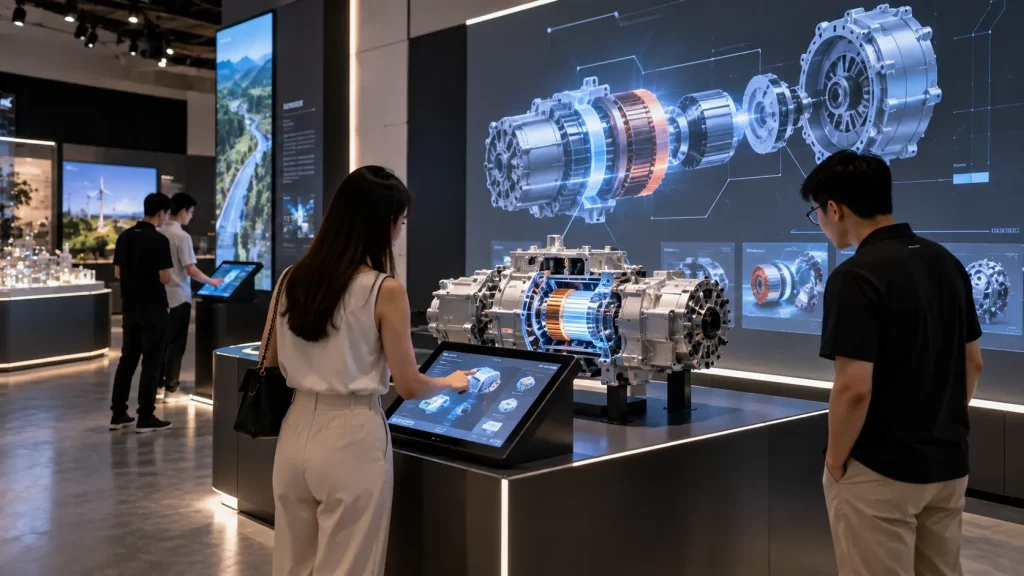
Some immersive experiences are designed for one visitor at a time, while others work better as shared group experiences.
| Individual Experience | Shared Experience |
|---|---|
| Touchscreen exploration | Immersive projection room |
| Product configurator | Large interactive wall |
| Personalised AI output | Audience interaction |
| Detailed information | Cinematic storytelling |
| Personal choices | Collective visual response |
A larger installation may combine both.
Visitors could first experience a shared immersive introduction and then move into smaller interactive stations for deeper exploration.
Step 10: Design for Visitor Capacity
Visitor capacity should be considered early, particularly for exhibitions, museums and public attractions.
An installation may look impressive but create operational problems if each interaction takes several minutes and only one person can participate at a time.
Capacity planning should consider:
- Visitors per hour
- Experience duration
- Number of simultaneous users
- Queue space
- Reset time
- Entry and exit flow
- Staff assistance
For high-traffic environments, some experiences can be designed for multiple users or passive viewing around an active participant.
Step 11: Connect Physical and Digital Elements
Immersive experience design does not need to hide every physical object behind a screen.
Real products, artefacts, models and architectural features can become part of the digital experience.
For example:
- A physical product can trigger related digital content.
- A scale model can be enhanced with projection.
- A museum artefact can sit within a surrounding visual story.
- A building model can connect to an interactive map.
- A scenic structure can become a projection mapping surface.
This physical-digital relationship can make the experience easier to understand because visitors are interacting with something tangible rather than only another display.
For commercial applications, see Immersive Brand Experience Malaysia.
Step 12: Plan the Content for the Space
Immersive content should be designed for the environment where it will appear.
A conventional presentation or 16:9 corporate video may not automatically work across a panoramic wall, curved surface or multi-wall room.
Content planning should consider:
- Physical dimensions
- Viewing distance
- Visitor position
- Projection geometry
- Screen resolution
- Interaction states
- Experience duration
- Visual hierarchy
- Sound
Large-format content should also avoid placing important information where visitors, physical exhibits or architectural features may block it.
Step 13: Use 2D and 3D Content Strategically
An immersive experience does not need to be completely produced in 3D.
Different content methods can be combined:
- Photography
- Film
- Motion graphics
- Illustration
- 2D animation
- 3D animation
- Real-time graphics
- Data visualisation
3D is particularly useful when the experience needs spatial environments, technical products, architecture, simulation or impossible camera movement.
Existing photographs and archive footage may be more effective when authenticity is important.
The content technique should follow the story rather than forcing the entire project into one visual style.
Step 14: Design Sound as Part of the Experience
Visuals often receive most of the attention during concept development, but sound can significantly influence how immersive a space feels.
Audio may include:
- Narration
- Music
- Environmental sound
- Sound effects
- Directional audio
- Interactive sound response
For shared immersive rooms, audio can guide attention and support transitions between scenes.
In open exhibitions, sound design should also consider neighbouring exhibits so different experiences do not compete with each other.
Step 15: Keep the User Interface Simple
Visitors should not need training before they can use a public interactive experience.
Interfaces should make the next action obvious.
For example, if the experience requires visitors to place an object on a table, the visual design should naturally indicate where the object belongs.
If visitors need to touch a screen, buttons and interactive targets should be easy to identify.
The objective is to reduce instructions and allow the experience itself to teach visitors how to use it.
Step 16: Consider Accessibility and Different Visitors
Experience design should consider that visitors may have different physical abilities, heights, languages and levels of familiarity with technology.
Depending on the project, this may influence:
- Touchscreen height
- Text size
- Interaction reach
- Audio support
- Language selection
- Seating
- Alternative interaction methods
- Clear circulation paths
Accessibility considerations are easier to integrate during design than to add after fabrication and software development are complete.
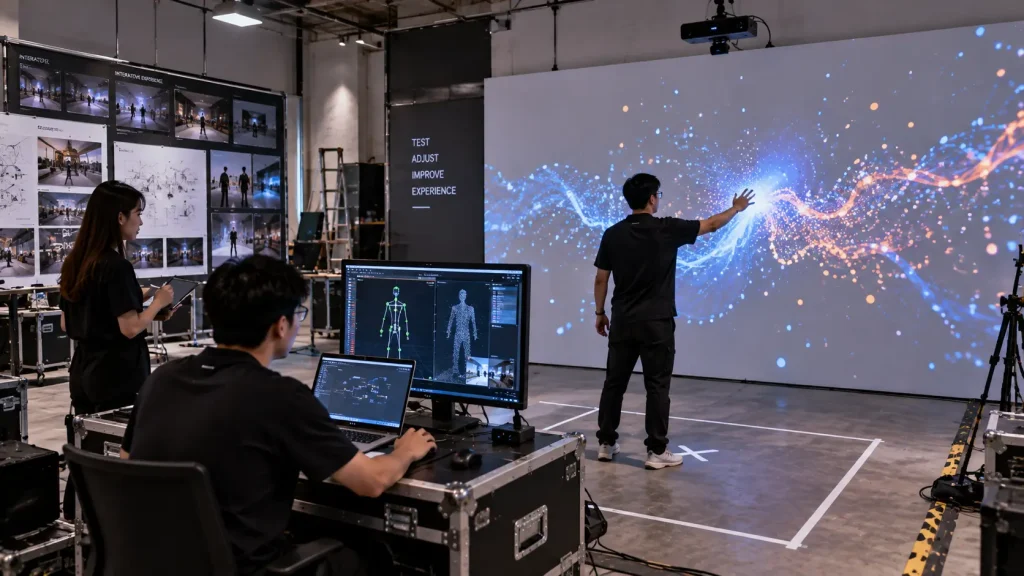
Step 17: Prototype Before Building the Final Experience
For custom interactive projects, testing the core idea before final installation can identify problems early.
A prototype does not always need to reproduce the final environment.
It may simply test:
- Sensor detection
- Touch interaction
- Object recognition
- Game logic
- Interface flow
- Real-time visual response
- Visitor positioning
This allows technical and experience issues to be resolved before they become part of the finished physical installation.
Step 18: Test with Real People
A system can work technically and still be confusing to visitors.
User testing should observe what people actually do rather than only asking whether they like the concept.
Useful questions include:
- Do visitors know where to begin?
- Do they understand what is interactive?
- How long does the experience take?
- Where do queues form?
- Can multiple visitors use it comfortably?
- Do they understand the main message?
- What happens when someone uses the system unexpectedly?
The answers can influence both software and physical design before launch.
Step 19: Plan the Technical Integration
Once the experience, interaction and content have been defined, the individual technologies need to operate as one system.
An immersive installation may involve several components:
- Projectors or displays
- Playback computers
- Media servers
- Touchscreens
- Sensors and cameras
- Audio systems
- Lighting
- Interactive software
- Network infrastructure
- Physical exhibits
- Show control systems
The visitor should not feel that these are separate technologies.
For example, a visitor action might trigger several responses:
Visitor Action → Sensor Detection → Software Logic → Visual Response → Audio Response
The technical design should define how these systems communicate, what happens when the experience starts and stops, and how the installation can be recovered if one component requires attention.
Step 20: Conduct a Site Survey
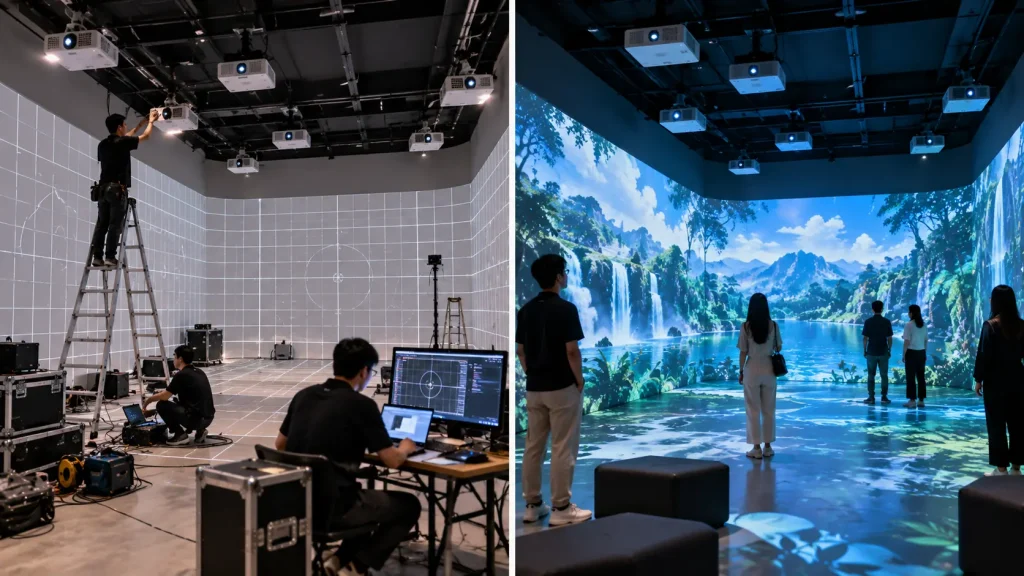
A site survey helps translate the experience concept into a practical installation plan.
Depending on the project, the survey may review:
- Room dimensions
- Ceiling height
- Projection throw distance
- Projector mounting positions
- Ambient lighting
- Wall and floor finishes
- Power supply
- Network availability
- Equipment locations
- Audio conditions
- Visitor circulation
- Installation access
For an existing venue, the survey can also determine whether current projectors, displays, computers or infrastructure can be incorporated into the new experience.
Technical limitations discovered at this stage may influence the final content or interaction design.
Step 21: Design for Real Operating Conditions
An immersive experience should be designed for the environment in which it will actually operate.
A projection concept that looks strong in a dark visualisation may perform differently inside a bright exhibition hall.
A motion tracking system tested with one person may behave differently when a group of visitors enters the detection area.
Real operating conditions may include:
- Ambient light
- Visitor shadows
- Background movement
- Noise
- High visitor traffic
- Long operating hours
- Children using the system
- Unplanned visitor behaviour
These conditions should influence the technology and experience design before installation.
Step 22: Decide Between Temporary and Permanent Installation
The same experience concept may require a different technical approach depending on how long it will operate.
| Temporary Experience | Permanent Experience |
|---|---|
| Events, exhibitions and roadshows | Museums, visitor centres and experience centres |
| Fast installation and dismantling | Integrated installation |
| Equipment may be rented | Equipment is commonly purchased |
| Temporary structures and cable routes | Concealed infrastructure where practical |
| Technical crew may operate the experience | Routine operation should be simplified |
| Short campaign lifecycle | Maintenance and future updates matter |
Temporary systems should consider transport, installation speed and repeated setup where required.
Permanent systems should consider reliability, ventilation, equipment access, maintenance and future replacement.
Step 23: Plan Daily Operation
Permanent experiences should not require a specialist programmer every morning simply to start the installation.
Where appropriate, normal operation can be simplified into a controlled process such as:
Power On → System Launch → Experience Ready → Daily Operation → Controlled Shutdown
Staff may also require simple controls for:
- Starting and stopping content
- Selecting experience modes
- Adjusting audio
- Restarting selected systems
- Checking system status
The operating interface should expose the controls staff need without giving unnecessary access to technical configuration.
Step 24: Plan for Maintenance
Maintenance should be considered during the physical design of a permanent installation.
Projectors, computers, sensors and other equipment should remain accessible for inspection or replacement.
Important considerations include:
- Projector access
- Filter and ventilation access where applicable
- Computer and media server access
- Sensor replacement
- Cable access
- Equipment cooling
- Software recovery
- Spare components
Hiding equipment completely may create a cleaner interior, but it should not make routine maintenance unnecessarily difficult.
Step 25: Plan for Future Content Updates
A permanent immersive experience may remain in operation for years while the organisation, products or information continue to change.
During development, identify which content is likely to require future updates.
This may include:
- Company milestones
- Product information
- Statistics
- Leadership information
- Project portfolios
- Maps
- Videos
- Language versions
Frequently changing information can sometimes be separated from more complex cinematic content so future updates do not require rebuilding the entire experience.
Step 26: Develop the Budget Around Priorities
The budget should follow the experience priorities established earlier in the design process.
A useful approach is:
Hero Experience → Essential Infrastructure → Content → Interaction → Supporting Experiences
This helps protect the most important part of the visitor journey if the scope needs to be adjusted.
For example, reducing five experience zones to three strong zones may be more effective than reducing the quality of every installation.
Major budget areas may include:
- Experience design
- Hardware
- Software development
- Content production
- Physical fabrication
- Installation
- Testing
- Operation
- Maintenance
For a detailed breakdown of the factors affecting project pricing, see Immersive Experience Cost Malaysia.
Step 27: Establish a Realistic Project Timeline
Immersive projects usually involve several disciplines working together, so the timeline should include more than content production.
A typical project may move through:
Brief → Concept → Site Study → Experience Design → Technical Design → Content & Software → Fabrication → Integration → Testing → Installation → Commissioning
The duration depends on factors such as:
- Number of experience zones
- Custom software requirements
- Amount of 2D or 3D content
- Physical fabrication
- Hardware lead times
- Client review stages
- Site readiness
- Installation access
Content, software and fabrication can sometimes progress in parallel, but they should work from coordinated dimensions and approved experience requirements.
Step 28: Coordinate the Different Project Teams
An immersive experience often sits between creative production, software development, audiovisual systems and physical construction.
Depending on the project, the team may include:
- Client and project stakeholders
- Experience designer
- Interior designer or architect
- Content production team
- 3D artists and animators
- Software developers
- AV specialists
- Fabricators
- Electrical and network contractors
- Site contractors
Coordination is especially important where physical dimensions affect digital content.
For example, changing the shape of a projection wall after content production has started may require the projection layout and visual composition to be updated.
Step 29: Test the Complete System Before Opening
Individual components may work correctly while the complete visitor journey still contains problems.
Final testing should therefore cover the full experience.
This may include:
- Startup and shutdown
- Projection alignment
- Content playback
- Audio synchronisation
- Sensor detection
- Touchscreen response
- Multiple-user interaction
- Network functions
- Experience reset
- Recovery after interruption
- Visitor circulation
For public-facing installations, testing with people who were not involved in development can be particularly useful because they are less likely to know how the experience is supposed to work.
Common Immersive Experience Design Mistakes
Many problems can be avoided by making the right decisions during the early design stage.
1. Choosing Technology Before Defining the Experience
Starting with a requirement such as “we need AI, VR and projection mapping” can create disconnected installations.
Start with the visitor objective and choose technology afterwards.
2. Making Everything Interactive
Constant interaction can become tiring and may weaken important storytelling moments.
Some content should be watched. Some should be explored. Some should respond to visitors.
The balance is part of the experience design.
3. Using Too Many Screens
Adding more displays does not automatically create immersion.
Physical products, artefacts, lighting, sound, architecture and projection can sometimes communicate more effectively than another rectangular screen.
4. Designing Only for the Best Camera Angle
A concept render may look impressive from one position while the real visitor experience is confusing from other parts of the space.
The design should be evaluated from actual visitor routes and viewing positions.
5. Ignoring Visitor Throughput
A one-person experience may create long queues during a high-traffic exhibition.
Interaction duration and simultaneous user capacity should match expected visitor volume.
6. Treating Content as the Final Step
Content should influence the spatial and technical design from the beginning.
Projection surfaces, physical exhibits and interactive zones should be developed with an understanding of what content will appear there.
7. Forgetting Maintenance
A permanent installation may look clean on opening day but become difficult to support if projectors, computers or sensors cannot be accessed.
Maintenance should be designed into the physical environment.
Immersive Experience Design Process
Although every project is different, the complete process can be summarised into eight stages:
- Discover – Understand the objective, audience, content and project constraints.
- Design the Journey – Define what visitors should experience from entry to exit.
- Develop the Concept – Translate the journey into spatial and interactive experiences.
- Plan the Technology – Select suitable projection, display, sensor, software and control systems.
- Create Content & Software – Produce the visual, audio and interactive components.
- Integrate – Combine digital systems with the physical environment.
- Test & Commission – Calibrate, test and refine the complete visitor experience.
- Operate & Maintain – Prepare the system for daily use, support and future updates.
What Information Should You Prepare Before Requesting a Proposal?
A detailed technical brief is not required at the beginning.
Useful starting information includes:
- Project objective
- Target audience
- Venue or location
- Floor plan or dimensions
- Photos or videos of the space
- Expected visitor volume
- Temporary or permanent installation
- Key messages or stories
- Physical products or exhibits
- Existing content and 3D assets
- Existing AV equipment
- Target completion date
- Estimated budget range
If the exact technology has not yet been decided, the project can begin from the objective and available space.
Why MyDigital Asia?
MyDigital Asia combines creative content, interactive software and physical technology to develop immersive experiences from concept through implementation.
Depending on the project, our scope can include:
- Immersive experience concept development
- Visitor journey planning
- Interactive touchscreen applications
- Interactive maps and wayfinding
- Projection mapping
- Immersive projection rooms
- Interactive walls and floors
- Motion tracking and sensors
- RFID and object-triggered experiences
- Interactive games
- Physical-digital product experiences
- 2D and 3D animation
- Real-time interactive software
- Hardware integration
- Installation and calibration
- Event operation
- Permanent system commissioning
The technology is selected according to the experience rather than forcing every project into the same technical package.
Frequently Asked Questions
What is the first step in designing an immersive experience?
Start by defining the objective, target audience and what visitors should understand, feel or do. Technology selection should follow the experience requirements.
Do immersive experiences always require projection?
No. An immersive experience may use projection, displays, physical exhibits, touchscreens, sensors, sound, lighting or a combination of technologies. The appropriate system depends on the experience.
How many interactive zones should an immersive space have?
There is no fixed number. The number of zones should follow the visitor journey, available space, expected visitor volume and project budget. A smaller number of strong experiences can be more effective than many disconnected installations.
Can an existing room be converted into an immersive experience?
Yes. Existing rooms can often be adapted, although dimensions, surfaces, ambient light, ceiling conditions, power, network infrastructure and equipment positions should be reviewed first.
Can existing videos and 3D models be used?
Yes. Suitable existing assets can be incorporated into the experience, although they may require adaptation for the physical environment, projection format or interactive system.
Should the interior designer and technology team work together?
Yes. Early coordination is useful because wall dimensions, ceiling design, equipment access, lighting, furniture and visitor circulation can directly affect the digital experience and technical installation.
How much does immersive experience design cost in Malaysia?
The cost depends on the project scope, space, hardware, content, software, interaction, fabrication and installation requirements. See Immersive Experience Cost Malaysia for a detailed budgeting guide.
Design an Immersive Experience in Malaysia
A successful immersive experience is not defined by how many technologies are installed.
It is defined by how effectively the physical environment, digital content and visitor interaction work together to create a clear journey.
Starting with the objective and visitor experience makes it easier to choose the right technology, control the budget and develop a system that can operate reliably in the real environment.
MyDigital Asia can support immersive projects from early experience planning and concept development through content production, interactive software, system integration, installation and commissioning.
Contact MyDigital Asia with your project objective, location, space dimensions, target audience, timeline and available budget range to discuss an immersive experience design in Malaysia.
Related Immersive Experience Guides
- Immersive Experience Malaysia
- Immersive Room Malaysia
- Immersive Exhibition Malaysia
- Immersive Museum Malaysia
- Interactive Experience Centre Malaysia
- Immersive Visitor Centre Malaysia
- Immersive Brand Experience Malaysia
- Immersive Event Technology Malaysia
- Immersive Experience Cost Malaysia
Request a Free Consultation
Looking for Interactive Maps, Interactive Solutions or Event Technology?

LATEST POSTS